Old Chevelles
Welcome to OldChevelles.com, built by Auto Enthusiasts for Auto Enthusiasts. Cars are not our only interests so please feel free to post about any subject the community might enjoy or you just feel you need to air.
We respect free speech and constructive dialogue however we don't allow threatening talk against members, nudity, or pornography. Threads are monitored and trolls are not tolerated.
This site is completely free and there are no costs. Please enjoy and provide feedback.You are using an out of date browser. It may not display this or other websites correctly.
You should upgrade or use an alternative browser.
You should upgrade or use an alternative browser.
My 69 project
- Thread starter 1969chevmalibu1969
- Start date
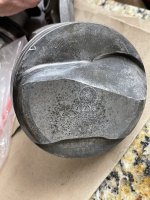
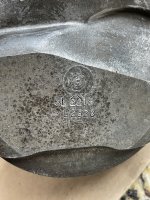
I've never seen a piston part # restamped ?
Looks like 2218 is a Ford # and the factory had to correct the mistake ?")

Looks like 2218 is a Ford # and the factory had to correct the mistake ?
1969chevmalibu1969
Well-Known Member
I’ll ask the guy I got them from if he had any info. Is paired with a 396 block. Not sure if the others are the same.I've never seen a piston part # restamped ?
Looks like 2218 is a Ford # and the factory had to correct the mistake ?
View attachment 5919
Looks like a factory mistake. If they all measure the same I wouldn't worry about it.I’ll ask the guy I got them from if he had any info. Is paired with a 396 block. Not sure if the others are the same.
1969chevmalibu1969
Well-Known Member
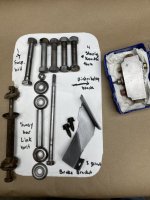
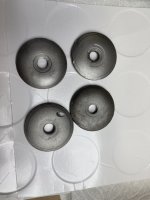
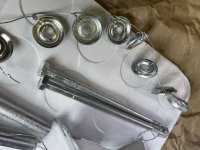
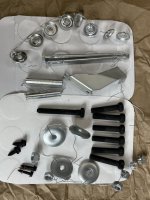
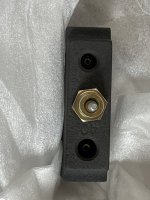
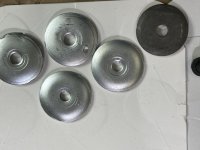
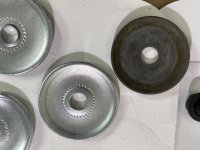
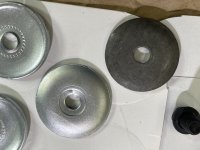
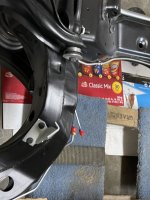
Got some things from Brake Booster and Mike came through again. Looks great. All original bolts off car and bolts for dust shield that came with the front disk I got.. phosphated. Brackets, washers and nuts plated. Distribution block rebuilt and finished.
1969chevmalibu1969
Well-Known Member
Got some things from Brake Booster and Mike came through again. Looks great. All original bolts off car and bolts for dust shield that came with the front disk I got.. phosphated. Brackets, washers and nuts plated. Distribution block rebuilt and finished. Before pictures included.
Attachments
-
 230E3EDD-F81F-493F-B211-02C9095D76FE.jpeg151.9 KB · Views: 5
 -
 ADF11993-6AB9-4017-9452-9DDE5F7F5E5E.jpeg102.5 KB · Views: 4
 -
 F95D8910-1548-4FCA-B67D-77F720D6F55E.jpeg139.8 KB · Views: 3
 -
 D330FDE5-F3F7-4B4A-A972-DA2AB59B658C.jpeg112.3 KB · Views: 3
 -
 A7B658AB-451C-4508-83D0-0C2E590195EC.jpeg134.3 KB · Views: 3
 -
 7FD86201-B117-4055-AC77-FAAC6CE2EA83.jpeg154.1 KB · Views: 3
 -
 8100E144-0306-4B12-B29D-DBC5774EEE70.jpeg127.9 KB · Views: 2
 -
 EDC00E85-88DD-4A86-A6D1-A7257929671A.jpeg121.2 KB · Views: 1
 -
 79F966EF-5E04-4584-AE6F-68140F4B6294.jpeg128.1 KB · Views: 2
1969chevmalibu1969
Well-Known Member
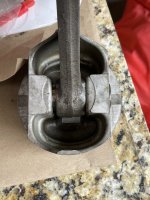
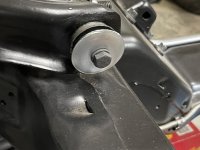
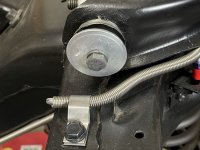
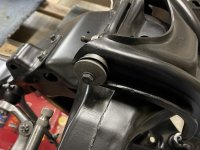
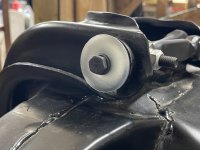
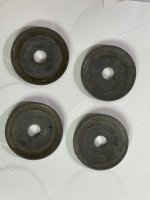
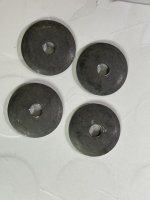
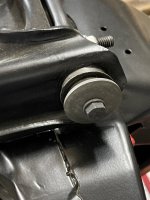
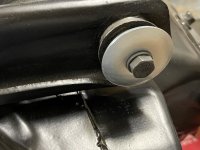
Replaced all the original washers on the upper control arm shaft. Took off the repo one I got in the beginning. Put plated back. Pictures of original and repo. Noticed the end washers and bolts aren’t in manual. Unless I missed it on another page.
Attachments
-
 D28F0951-A32B-4650-B2BA-6163EDD8A5F6.jpeg168 KB · Views: 0
 -
 2F20DB04-026B-4347-93E5-0CB8776855B2.jpeg131 KB · Views: 0
 -
 F9D18A4E-DF0B-450B-AD52-38C3A60849C3.jpeg120.2 KB · Views: 0
 -
 4D382D15-C24E-4E77-9789-E14D08F1C126.jpeg143.1 KB · Views: 0
 -
 162B66F0-A694-4264-9768-86AADD005F1B.jpeg132.7 KB · Views: 1
 -
 82EFA957-9ED2-4A6D-B88B-080E14885DA4.jpeg124.3 KB · Views: 1
 -
 CD7CB48E-5346-4EF2-98D7-20729755F225.jpeg197.8 KB · Views: 1
 -
 59D53CA0-5757-4A31-9B31-2F5A85155161.jpeg189.2 KB · Views: 1
 -
 8B78C8C8-6398-498B-8438-0508420CBA66.jpeg157.1 KB · Views: 1
 -
 239A4FBB-AA3A-4844-B443-0B8888B69990.jpeg145.9 KB · Views: 1
 -
 E63D8C4E-310A-4368-80F2-1BB5B6C9B649.jpeg151.8 KB · Views: 1
 -
 E2C16FB6-04AD-40EB-AF0C-82B5CF647B3D.jpeg99.1 KB · Views: 1
 -
 72B6B63C-8B6E-44A2-BC4E-0EBA6157A757.jpeg91.8 KB · Views: 0
 -
 6555BFFA-3E26-42EA-A91D-27376A75D8DC.jpeg134.4 KB · Views: 1
 -
 0E609FC6-048B-418A-85B8-E56A3D3450A3.jpeg119.9 KB · Views: 1
 -
 15F0E243-180E-484B-B1C2-266B5937800A.jpeg117.1 KB · Views: 1
 -
 12041838-9E77-450E-9E28-42A039A1B6B7.jpeg144.8 KB · Views: 0
 -
 AF8A005F-3EF7-4BA3-B2AA-4E49D1930C0E.jpeg140.9 KB · Views: 0
 -
 9142537B-53C7-42C6-8FFE-4323CDA099B2.jpeg127.9 KB · Views: 1
1969chevmalibu1969
Well-Known Member
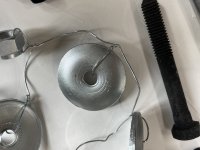
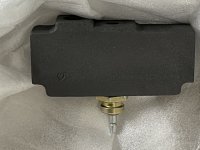
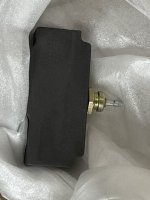
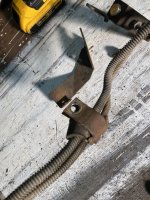
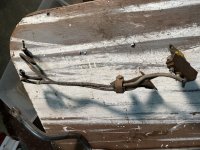
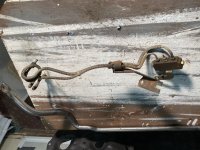
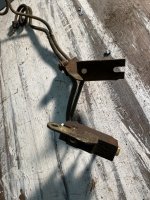
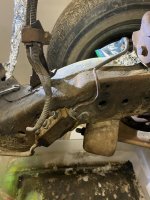
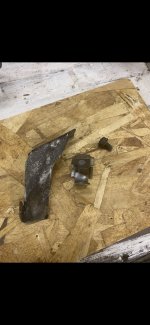
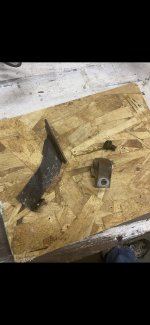
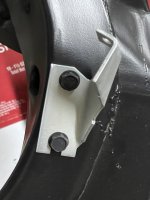
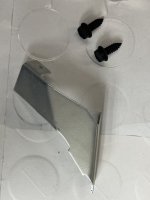
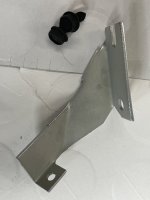
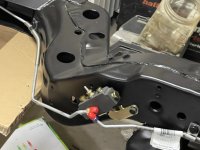
Remounted front brake line bracket. Originally on car. Painted it a few times. Installed removed then blasted bare again. Sent for plating.
Attachments
-
 0FDD3E3F-B29A-42C0-9BC2-78526FC9EF91.jpeg259.5 KB · Views: 1
 -
 2B5186AD-42A5-4E88-B631-ED66B57E9365.jpeg240.6 KB · Views: 1
 -
 26D933FC-9000-4C83-BD25-B02C0978885D.jpeg224.5 KB · Views: 1
 -
 B7B54931-24D0-42DA-BD07-B601F38C4708.jpeg269.4 KB · Views: 1
 -
 B79C125F-EDDB-49C3-A683-68402E688D07.jpeg265.8 KB · Views: 1
 -
 55447323-07BC-49AD-B03D-622AE082EE30.jpeg183.4 KB · Views: 1
 -
 73BFF393-E08A-4E25-A1A1-67C55CBE80D9.jpeg95.4 KB · Views: 1
 -
 2B156B16-FD9C-43E6-876D-7AFFC2FC6544.jpeg96.2 KB · Views: 1
 -
 917442AC-2548-4000-937A-622609CAD92F.jpeg167.1 KB · Views: 1
 -
 A47E4449-ACB8-4FC9-8B97-AC0D1AA6FCC2.jpeg104.8 KB · Views: 1
 -
 FA4147BC-7F22-47A0-9AA5-4EEA1D2B5EBA.jpeg139.7 KB · Views: 2
 -
 AE53AB25-8AF5-4907-9AF8-D13DA3940FC7.jpeg86.9 KB · Views: 2
 -
 A9C83AE4-B6C4-4806-971B-4A2D6B58536F.jpeg91.5 KB · Views: 2
 -
 F17A8675-BCA1-4D2C-AEF7-44B678075746.jpeg89.2 KB · Views: 3
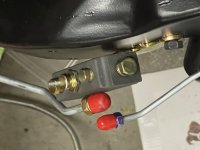
I'm pretty certain that stand-off bracket for your lines wasn't used on power disc cars. The wrap-around bracket was mounted to the power booster stand-off bracket. It'll show it in the AIM under "J52" option list. That little clip that joins the 2 vertical brake lines should be painted a medium yellow.....the one that's 1/4" wide and free floating.
Earlier you asked how thick the spot welded reinforcement was on the rear control arm. It's 14 gauge or .080.
Earlier you asked how thick the spot welded reinforcement was on the rear control arm. It's 14 gauge or .080.
1969chevmalibu1969
Well-Known Member
I’ve been looking for a different piece for the control arm. Thanks for the gauge. As for the brakes that’s where I’m not sure. I’ve seen a few different setups in the AIM. I just haven’t seen a picture I can follow. The setup I have is 69 disk front goes to distribution block on frame. Then one line to rear drums. Now I have 69 booster with metering valve. That’s where I get lost.I'm pretty certain that stand-off bracket for your lines wasn't used on power disc cars. The wrap-around bracket was mounted to the power booster stand-off bracket. It'll show it in the AIM under "J52" option list. That little clip that joins the 2 vertical brake lines should be painted a medium yellow.....the one that's 1/4" wide and free floating.
Earlier you asked how thick the spot welded reinforcement was on the rear control arm. It's 14 gauge or .080.
It shows that bolt on clip attaching to the booster bracket, not the frame standoff. Since the booster wasn't used on non-power brakes, the frame bracket was necessary.
1969chevmalibu1969
Well-Known Member
I found these. I’m going to look through some different manuals maybe I fine something I’m not understanding. Your help is great it’s me. ThanksIt shows that bolt on clip attaching to the booster bracket, not the frame standoff. Since the booster wasn't used on non-power brakes, the frame bracket was necessary.
Attachments
1969chevmalibu1969
Well-Known Member
Is this the clip? Found in 64-88 Chevrolet mid size chilton.I found these. I’m going to look through some different manuals maybe I fine something I’m not understanding. Your help is great it’s me. Thanks
Attachments
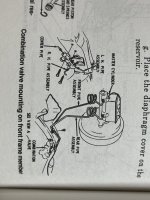
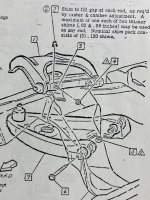
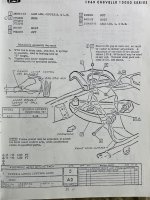
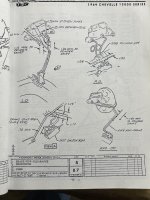
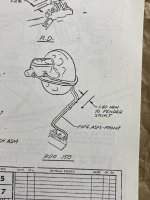
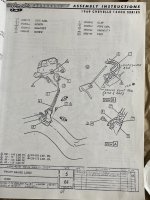
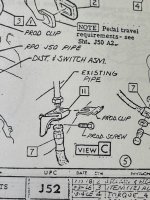
You need to look at J52, that's power front disc brakes, J50 is power drum brakes which has different lines. Study the differences. There are 2 clips, the little yellow one that joins the 2 lines but doesn't attach to anything else. Then there's the clip that wraps around both lines and attaches to the brake booster bracket. If I remember correctly, there's a "view" that shows a detail of the bracket's attach point. The only parts you can reuse from your old drum brakes are the distribution block and both clips. The lines, the standoff bracket and the master cylinder won't work.

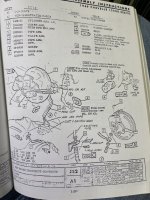
Even though this pic is for drum breaks, the #5 clip is reused for power discs, it's painted yellow. The #8 clip is reused also, and moved from the frame position to where it's bolted to the brake booster bracket. It also uses 2 heater hose looking cushions around the lines. Not sure if you have an assembly manual or you're just digging up pages of the interweb. If you don't have a complete book, you really need to get one.
1969chevmalibu1969
Well-Known Member
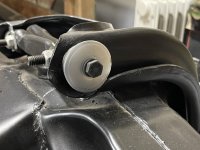
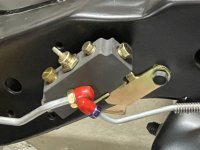
Thanks. I do have the manual and also look up the web. I’ve decided to move on and look more into this when I get to the m/c and booster. I reinstalled the distribution block That had been rebuilt and coated. I have to get the knuckles done to finish the rest of the brakes up front.View attachment 6173
Even though this pic is for drum breaks, the #5 clip is reused for power discs, it's painted yellow. The #8 clip is reused also, and moved from the frame position to where it's bolted to the brake booster bracket. It also uses 2 heater hose looking cushions around the lines. Not sure if you have an assembly manual or you're just digging up pages of the interweb. If you don't have a complete book, you really need to get one.
Attachments
1969chevmalibu1969
Well-Known Member
So am I looking for the brackets in view c?View attachment 6173
Even though this pic is for drum breaks, the #5 clip is reused for power discs, it's painted yellow. The #8 clip is reused also, and moved from the frame position to where it's bolted to the brake booster bracket. It also uses 2 heater hose looking cushions around the lines. Not sure if you have an assembly manual or you're just digging up pages of the interweb. If you don't have a complete book, you really need to get one.
Attachments
1969chevmalibu1969
Well-Known Member
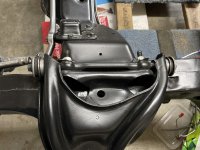
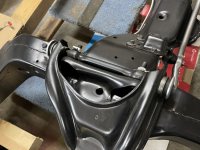
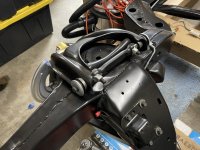
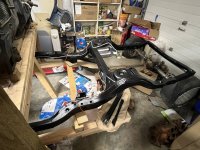
Ended up loosing my phone and also needed a break. Amazing how much pictures can help reassembly. Got the front dust shield and bracket on. Waiting to pack bearings and finish rotors and calipers spun the frame and am starting the rear install.
Attachments
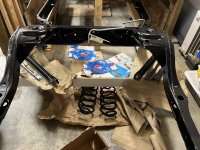
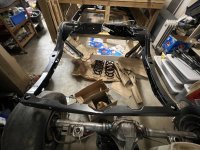
When I see cars down to the bones it reminds me of my younger days working for GM. The factory would knock off roughly 50 cars per hour off the final assembly line. As I recall we would have +/- 2500 employees per shift. That factory was an amazing work of art. The body shop would run a bit faster so as to keep a bank of cars at the ready thus not stopping the production of the entire plant. As an enthusiast I actually loved building cars back then.
Looking very nice