Old Chevelles
Welcome to OldChevelles.com, built by Auto Enthusiasts for Auto Enthusiasts. Cars are not our only interests so please feel free to post about any subject the community might enjoy or you just feel you need to air.
We respect free speech and constructive dialogue however we don't allow threatening talk against members, nudity, or pornography. Threads are monitored and trolls are not tolerated.
This site is completely free and there are no costs. Please enjoy and provide feedback.You are using an out of date browser. It may not display this or other websites correctly.
You should upgrade or use an alternative browser.
You should upgrade or use an alternative browser.
My 69 project
- Thread starter 1969chevmalibu1969
- Start date
Look-in good. I found a 12 bolt years ago and had a fun time rebuilding it. My buddy set up the gears 3:73 and she goes pretty good.
1969chevmalibu1969
Well-Known Member
Ya, I was lucky to buy it a couple years back and even then some were going for a lot. I want to add posi and change gears but that will happen when I come across that deal.Nice work. Man, I’d love a 12 bolt but I think they’re priced out of my reach these days. I guess I could afford one or one of the new manufactured 12 bolts on 9 inch rear ends but it probably overkill for my small block car. If I get the urge to upgrade a OD trans would be more useful to me.
1969chevmalibu1969
Well-Known Member
No but my uncle has a boxed set he did. I’m trying to use as much original stuff I have with the car. Just it came with a 10 bolt that won’t work. Also been buying things since I started again in 2018. That will come in the build story later.Did you box your control arms?
1969chevmalibu1969
Well-Known Member
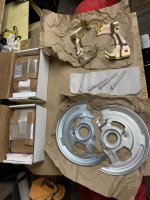
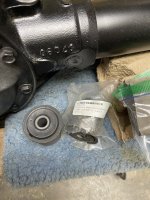
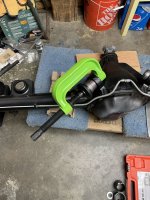
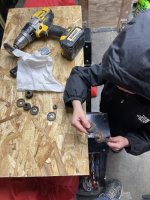
used a drill to remove the center rubber. Collapsed the bushing with a chisel and knocked I out with a hammer. Very easy job. Now to clean the holes and install new bushings.
Attachments
-
 F2238AE9-2A1E-4E64-990B-D23C1D8A1677.jpeg172.4 KB · Views: 15
 -
 BC74DF42-E0A0-4543-9F5A-16FF9C479DEF.jpeg197.7 KB · Views: 9
 -
 B52CA2F1-F206-46BC-B68C-A106BD1A9DE8.jpeg185.9 KB · Views: 5
 -
 5B3EADC6-22E2-4521-A742-F4760B42FE47.jpeg133 KB · Views: 5
 -
 C797A46D-A237-404D-AF76-1172ECF6B656.jpeg215.1 KB · Views: 5
 -
 FA0B84EB-6432-454D-BF24-C955B14D3719.jpeg156.4 KB · Views: 5
 -
 83A6061A-CC00-452B-8FDF-370015C6849D.jpeg188.1 KB · Views: 6
 -
 85A72278-55E6-4E33-A812-B13491273B6F.jpeg195.4 KB · Views: 9
I boxed mine and it was cheap ($35). You can't tell anything has been done. If you install a rear sway bar they should be boxed.No but my uncle has a boxed set he did. I’m trying to use as much original stuff I have with the car. Just it came with a 10 bolt that won’t work. Also been buying things since I started again in 2018. That will come in the build story later.
RESTOPARTS Manufactured RCAI001 RESTOPARTS® Manufactured Boxed Lower Rear Control Arm Conversion Kits | Summit Racing
Free Shipping - RESTOPARTS® Manufactured Boxed Lower Rear Control Arm Conversion Kits with qualifying orders of $109. Shop Control Arm Upgrade Components at Summit Racing.
1969chevmalibu1969
Well-Known Member
I don’t think I’m going to add the rear sway bar, but that may change. Thanks for the linkI boxed mine and it was cheap ($35). You can't tell anything has been done. If you install a rear sway bar they should be boxed.
RESTOPARTS Manufactured RCAI001 RESTOPARTS® Manufactured Boxed Lower Rear Control Arm Conversion Kits | Summit Racing
Free Shipping - RESTOPARTS® Manufactured Boxed Lower Rear Control Arm Conversion Kits with qualifying orders of $109. Shop Control Arm Upgrade Components at Summit Racing.www.summitracing.com
1969chevmalibu1969
Well-Known Member
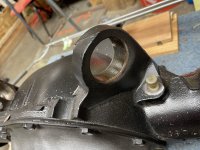
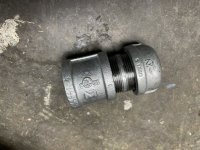
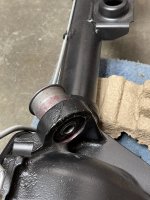
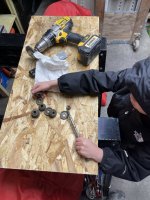
Put the fittings together and installed one bushing. The bushing and ear were greased and the bushing went right in. Tried this on the other side with no give. I’ve read this happens. Now I will try to press in.
Attachments
I've beat every bushing in with a deadblow and appropriately sized socket. Freezing the bushings overnight helps, cleaning female, and a little light viscosity oil. Always expect to crack those ears, but haven't done that yet.
1969chevmalibu1969
Well-Known Member
Ya I was trying with the one. Head came off the mallet, but it was old and already falling apart after the first one.I've beat every bushing in with a deadblow and appropriately sized socket. Freezing the bushings overnight helps, cleaning female, and a little light viscosity oil. Always expect to crack those ears, but haven't done that yet.
1969chevmalibu1969
Well-Known Member
So after getting a loaner tool from the auto store. I put a washer on one side of the ear and with the ball joint press pressed it in. Worked easy just a little tricky setting it up.I pressed until where both the clamp picture and picture with the bushing at the edge. The rest of the way was with the pipe fitting set up and a few blows with the mallet.
Attachments
1969chevmalibu1969
Well-Known Member
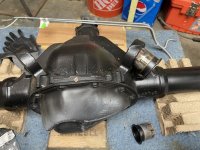
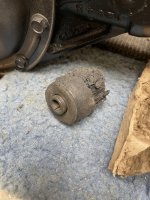
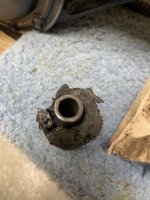
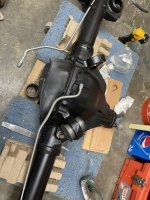
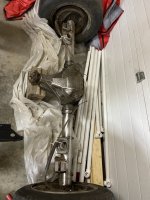
I don’t think I posted much on the painting part here. I might have on ocs and I think that might have been where I left off there. I would have to go back for some pictures, but it’s was pretty much wire wheel and sand paper. Probably could have used a da but did it by hand. Then I spray it with self edge primer and painted with spray max. I just walk out to the garage and took a picture of my old 10 bolt I took out of it. It’s coded for a 69 Chevelle. I started it then it took a back burner. I need to finish it..oh well I guess I have a lot of time. I think it will go to my uncle who wants it for his 66 or 67 4 door Chevelle. I can never remember which year.Sorry if I missed this part.
You rear end looks great (tee hee)
How did you clean it up and paint?
I was going to use wire brush on a 4 inch grinder and black epoxy.
Attachments
1969chevmalibu1969
Well-Known Member
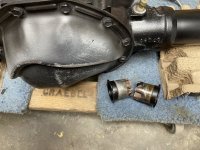
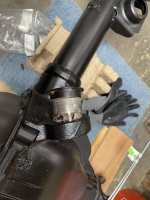
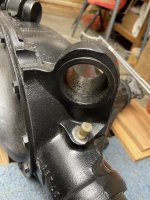
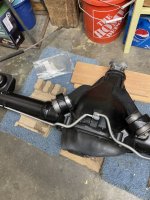
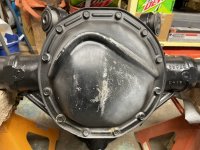
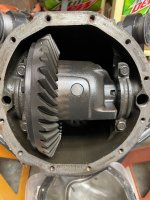
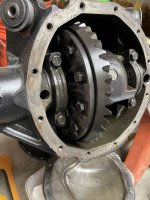
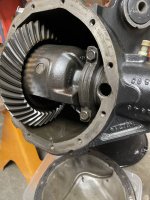
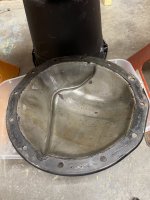
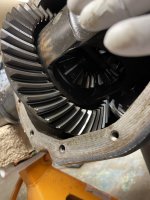
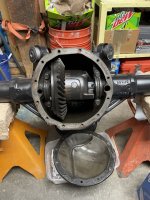
Getting ready to clean the differential cover. I opened the rear for the first time since I got it.
Attachments
-
 4D42D5AD-7A5D-493A-A5CB-8A5EA3FB6517.jpeg192.3 KB · Views: 4
 -
 65484163-CD8F-4675-B6D1-637A827DA5D5.jpeg167.8 KB · Views: 4
 -
 9B20E90A-2F7A-4BFE-8AA1-C8B370ABFCF0.jpeg171.3 KB · Views: 4
 -
 13480957-AB72-4D69-B020-877EACB00E08.jpeg181.4 KB · Views: 4
 -
 05DDB174-E470-40D2-A3DA-3574172C3482.jpeg161.5 KB · Views: 4
 -
 C5BD7006-AC79-4ECC-97B8-8DB1338AE8CC.jpeg134.8 KB · Views: 5
 -
 5D62F2ED-B104-42BD-9870-5F94DBA439D3.jpeg196.4 KB · Views: 8
1969chevmalibu1969
Well-Known Member
1969chevmalibu1969
Well-Known Member
Well I’ll send him your wayLooks like a big helper to me.....
kmakar
Janitor
Well I’ll send him your way
All day long an twice on Sunday's. Been a long time since my kids were that young. My grandson just turned 7 and I love that little boy with all my heart.
1969chevmalibu1969
Well-Known Member
Yes I should rephrase that and say I’ll bring him. I don’t like him going anywhere without me. Plus then I can go.