What's new
Old Chevelles

Welcome to OldChevelles.com, built by Auto Enthusiasts for Auto Enthusiasts. Cars are not our only interests so please feel free to post about any subject the community might enjoy or you just feel you need to air.

We respect free speech and constructive dialogue however we don't allow threatening talk against members, nudity, or pornography. Threads are monitored and trolls are not tolerated.

This site is completely free and there are no costs. Please enjoy and provide feedback.
  • We've enabled the website app for anyone who wants to use it on a mobile or desktop device.

  • We've changed the header logo to display our Member's Cars.

    If you'd like your car to show up there, go to the forum Site Bugs & Feature Requests and post your image in the "Member's Car Pictures for the Header Logo" and we'll add your car into the lineup.

12 bolt swap from 10 bolt

Those bars were added to all big block cars and I believe any 4 speed car with 300hp small blocks....don't quote me on the latter.

As to the upper control arm modification....since you've already painted yours, I'd just radius the bottom rear inside corner per the picture I posted, the cut a 14 ga. wafer to the size I pictured, then drill the hold out to 3/4" (the wafer), and weld it 360* around the bolt hole and finish it out to 1/2+. You can take a 1/4" drill and simulate the spot weld depressions per the example I posted if you want to get picky....I would. Then paint again. No bending required, just adding a reinforcement "washer," wafer.
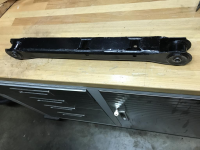
Thanks I am going to modify it and appreciate your help. I’ve still got paint and was already going to paint the rear again before I install it and there will be paint left to do that control arm.
 
Working on getting things lined up for the rear install I am finding some changes from the 10 bolt. I thought that the u bolt would work, but when I tried it it was to small. After some research it needs to have the bolt and strap set as the holes are threaded. Called a place ( can’t remember name off hand) she was very helpful. I sent some pictures because there are two types. She said she knew the exact ones. In going to call and order tomorrow and post place and product later. May add to project detail tread and put difference between my 12and10. So now to the question, will I now have to change my driveshaft to? Also going from th350 to th400.
Might have some extra u-joint straps if you need them.
 
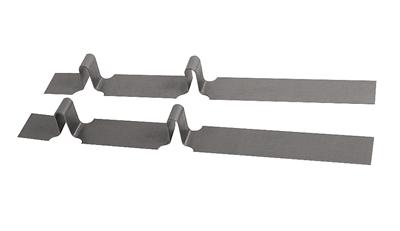
Here is the kit you need to "box" your lower control arms. I did mine and the rear sway bar fit perfectly :

View attachment 5480

That funny I think I have those laying around and was wondering what they were. We’re I get home I’ll check.
 
Those braces were on anything equipped with a 350 or bigger, and not specific to F41.
Thanks. They were on the car when I stripped it for powder. I wasn’t sure if they were for the F41. Did air shocks mean anything besides no one wants them? My rear bumper shows it had them.
 
Top Bottom