What's new
Old Chevelles

Welcome to OldChevelles.com, built by Auto Enthusiasts for Auto Enthusiasts. Cars are not our only interests so please feel free to post about any subject the community might enjoy or you just feel you need to air.

We respect free speech and constructive dialogue however we don't allow threatening talk against members, nudity, or pornography. Threads are monitored and trolls are not tolerated.

This site is completely free and there are no costs. Please enjoy and provide feedback.
  • We've enabled the website app for anyone who wants to use it on a mobile or desktop device.

  • We've changed the header logo to display our Member's Cars.

    If you'd like your car to show up there, go to the forum Site Bugs & Feature Requests and post your image in the "Member's Car Pictures for the Header Logo" and we'll add your car into the lineup.

Es Carne de Burro V

Aside from being the wrong ones (were for a '71-'72 with no marker lights) both fenders were packed with pine straw and dirt from 25 plus years of storage, and were so rusty that they practically fell apart when removed, so it'll get two new ones. It has an SS hood that needs two small patches on the inner structure to be useable, unless a flat hood can be found in time. WTF, flat hoods used to be everywhere for $25, have not found one within driving distance at any price, and have been looking for a year!
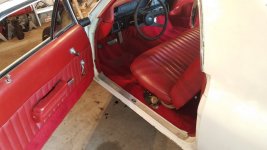
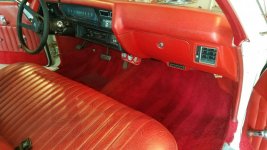
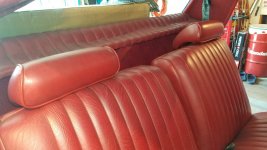
The rest of the body is in amazing condition, including one of the nicest beds on any Elky I've ever worked on, and will be an easy job to prep for paint. The interior is an upholstery shop special, but is in excellent condition and can be used as is.
 
I don’t know if y’all picked up the background on the last pic. That is a very rare 1971 GMC Sprint with a never-before-seen buildsheet and oodles of factory docs. It has had one repaint but very original otherwise. The car is a time capsule down to the hubcaps and whitewalls. It is immaculate. Dave can post more on that one if he cares to. We’re both nuts for El Caminos.
 
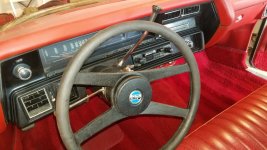
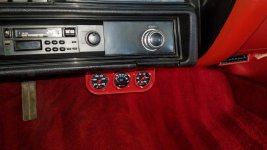
One of the best things about Burro V (cinco) from the beginning was the interior. While not stock, it is nice. Dave put a lot of elbow grease in cleaning it up. He added a customized gauge panel and gauges under dash. We're going to place a small tachometer where the clock was. I have a four speed conversion in the future for it and want a shift light. Where the auto shift indicator is, I'm going to make a shift light that comes on there.

We need some pedal pads, dye the seatbelt retrractor covers red, a red leather steering wheel cover (I like the black center but like a leather wheel). I will at some point in the future add a set of 3 point belts in red.
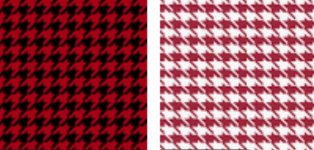
I have a tilt wheel I will install with the four speed conversion. And to tone down the red a bit, I'm going to have red houndstooth inserts made for the front seat. I'm still waffling between red/black and red/white with a favor towards white.

There's a clue in the pictures about the future theme of this car that will be revealed later.

20200705_152353_resized.JPG
20200705_152421_resized.JPG
20200705_152513_resized.JPG
20200705_152450_resized.JPG
20200705_152525_resized.JPG
Here's a little green so now we can have Christmas! Cheers!
1640269380719.png
 
We’re removing the belt line trim because I just don’t like it. However, the sides need something. Dave has championed a Malibu stainless rocker molding and I like it. I started thinking about adding black D96 stripes, such that you would find on a 68 SS between the style line and top of rocker. There wouldn’t be any white below it on either the very front or rear segments.

This was the 3rd of 6 artistic renderings. Thoughts?
PS. Dave isn’t a fan. He said this is the one he “disliked least”.
D87A35F9-DF4B-4395-9A36-EE74A43029A6.jpeg
 
Regarding the Sprint that Alan mentioned, it is truly an amazing car. It was sold new at Ralph and Sons GMC in Chickasha OK, and the owner passed after a year. Mr Ralph bought as his personal car, and it went into storage in 1983. Fast Forward to 2020 and the family was liquidating his stuff after his passing. GM took their franchise on the early 2000's when they cut a lot of small market dealers as part of the "GM 2000" plan. They are now one of the largest Michelin dealers in the US, selling tires out of the old dealership. The car appeared on ebay and a friend bought it and called me in on it. It came with two build sheets, window sticker and the only known to exist dealer invoice for an GMC Sprint, per John Ziegler of the Sprint registry. I have registration receipts for every year in the dealership name, rare Sprint only owners manual (different from El Camino) POP, key knockouts in envelope, a dealer front plate, 71 Oklahoma plate and a dealership key ring.
As Alan mentioned, it was painted once in the late '70s and presents very well, the interior is original except seat cover and carpet, and the underhood is original except for items replaced to make it useable. It is as close to a new vehicle as you could find, and driving it makes you understand why Chevelles and other A body cars were so popular in their time.
Its a 350 2bbl, TH350, 2.56 geared car, not a hot rod, but one I could see being a lifetime car at least for me.
 
5D82C008-BBD5-4607-BE6B-606F99C90FEC.jpeg6852A42D-5159-49DB-ACD5-EE48B5B079D1.jpeg617C926B-4BEC-4B2B-B573-A59C03002F9D.jpeg1DBD8CA2-BE7F-40F0-B2ED-362A91E6ABA5.jpegF81BE5F7-DF1E-4AFB-A1B5-29B250426850.jpegOK, time to quit wasting time.

The Burro was delivered to my shop where my guys got it running and repaired the brake lines enough to take a drive. I loaded it on my trailer and took it to SSuper Daves’s place where he graciously hosts it.

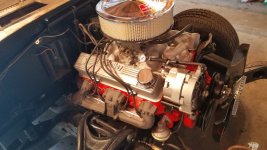
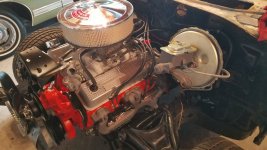
Dave has reconditioned the underside. The 15x7 rally wheels were sandblasted and repainted. The transmission worked so it was treated to a service. Dave does a really nice job of detailing things. He had the front clip off and stripped the motor down to repaint it, I bought a new cam because I wanted to spice it up a bit. The cam I installed has the same specs as an LT-1. So buzzed in and swapped the cam whilst everything was easy to access.

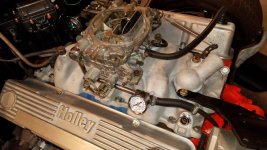
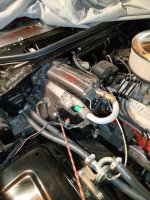
We also had a hole from corrosion in the Edelbrock Performer that was on it. I had it repaired but went with something else. I found a vintage LT-1 intake manifold to install on it. I also want to run the LT-1 valve covers but Dave had the Holley valve covers available. We put a little elbow grease in them.

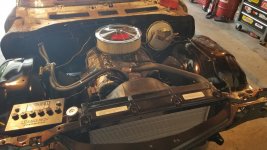
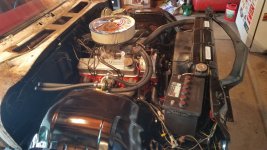
Dave went over the forward wiring harnesses and got them all up to snuff. We added new inner front fender wells and an aluminum radiator and Dave built out the front of the car sans fenders.

All of this was done before the repair in the lower cowl was repaired. We deliberated long and hard about how to do it. I wanted to make sure a solid and undetectable repair was done. It’s done and I’m pleased with the result.

Here’s todays picture installment.
 
Last edited:
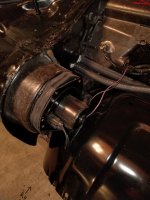
One of the “cool” things Dave has done is an upgrade on the blower motor. The AC suitcase is on the car and WILL BE used. Down here in Texas where humidity is high, we need our AC.

Hopefully Dave can share a write up on the blower upgrade.
 
Elky front body mount.jpg
COOL THREAD! Here is the worst part of my " burro uno" . No body mounts left, no inner rockers, but the topside looks like a CA Elky should. Maybe start a build thread once we repair the frame and get a new floor pan mounted to it, and start cutting out the "cancer".
 
The blower upgrade that Alan mentions is to use a C4 Corvette blower motor. It has more blades with a deeper pitch, and spins faster than a stock one, and increases air volume by about 30 %. The only issue is that the cage is about an inch deeper than stock, and bottoms out in the a/c box. You need to make a spacer ring out of 3/4" plywood and use longer screws and its a perfect fit. There is also a connector to go along with it to slice into the wiring harness. I've done this several times and works on any GM vehicle of the era. The last Elky I had with this mod, recalibrated POA valve and parallel flow condenser with R134A on an otherwise stock system cooled to 37 degrees at the center vent.
 
The blower upgrade that Alan mentions is to use a C4 Corvette blower motor. It has more blades with a deeper pitch, and spins faster than a stock one, and increases air volume by about 30 %. The only issue is that the cage is about an inch deeper than stock, and bottoms out in the a/c box. You need to make a spacer ring out of 3/4" plywood and use longer screws and its a perfect fit. There is also a connector to go along with it to slice into the wiring harness. I've done this several times and works on any GM vehicle of the era. The last Elky I had with this mod, recalibrated POA valve and parallel flow condenser with R134A on an otherwise stock system cooled to 37 degrees at the center vent.

Maybe you should patent an aluminum spacer (instead of plywood), but 37 degrees at the vent is refrigerator cold, and that'd be fine with me here in Florida.
 
Maybe you should patent an aluminum spacer (instead of plywood), but 37 degrees at the vent is refrigerator cold, and that'd be fine with me here in Florida.
That’s what we’re going for…refrigerator cold. Being in Florida, you know removing humidity is real important to temperature comfort. Plus it’s hard to cool these old tin boxes when they’ve been sitting in the sun. My Mach1 has a black interior and it can take your breath away.
 
View attachment 1382
COOL THREAD! Here is the worst part of my " burro uno" . No body mounts left, no inner rockers, but the topside looks like a CA Elky should. Maybe start a build thread once we repair the frame and get a new floor pan mounted to it, and start cutting out the "cancer".
Everyone enjoys detailed write ups with pictures. Love to see it.

I’m in the middle of replacing the lower cowl pieces right now. The side pieces were curved and I bought repros and only used the bottom 20%. The forward pieces I’m making. I’ll have full details on that later this winter.

In the meantime, Dave is readying the body for paint. There’s a few body trim holes I have to weld up. Otherwise no significant obstacles except time to do it. He and I both work rigorous schedules.
 
That’s what we’re going for…refrigerator cold. Being in Florida, you know removing humidity is real important to temperature comfort. Plus it’s hard to cool these old tin boxes when they’ve been sitting in the sun. My Mach1 has a black interior and it can take your breath away.

Yep. My wife will get into the car with shorts on (normal dress for Florida) and burn her legs on the seat too. I try to keep her garage bay open for her to park so her car stays cool.
 
I'm back for more updates. A couple of things to catch you up on.
The Burro is complete as far as the chassis and driveline goes. The interior is good to go. SSuper Dave is working on finishing mechanical details before we get on to the body and paint.

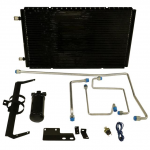
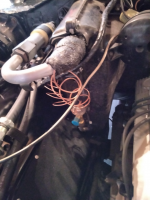
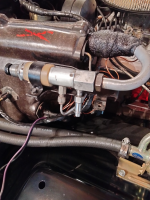
As was noted earlier, we have factory AC. We have a complete system with an enhanced blower system (Thanks SSD!) He was looking at universal condensers and a kit with drier, hose and fittings. He found what he wanted at Vintage Air. We have a perfect manifold hose and liquid line . This is a drop in for a factory system, so would require no cobbling together.
1642991372301.png

Today's progress.
1642991620940.png
1642991664213.png

We have to get a wiper motor and washer pump, and tailgate hinge repair kit. He wants to do as much stuff as he can under the hood so he's not cleaning up details after the bodywork is done.

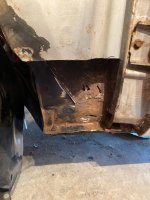
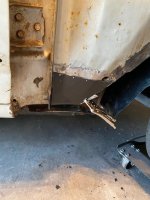
Now going back before Thanksgiving, I spent a Saturday working on fixing the lower cowl rust. I will finish these up on my next visit in Feb. Here's the driver's side with the rust cut out.
1642993045533.jpeg
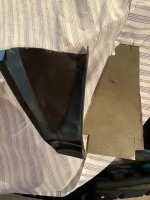
Here's the section off of the new cowl side ready for weld and the piece that goes behind the wheel that I will bend and install.
1642993128068.jpeg

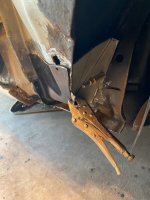
Here's the passenger side. Yeah, the hole above opened up after I cut the piece to fit it. I'll be making a plug for that hole.
1642993206940.jpeg
1642993352198.jpeg

In the meantime, Dave has to get a compressor wired to run his air tools. After that, it's sand, prime, block repeat before the paint. it will be repainted white. Then the most exciting part, and I find goes the quickest is final assembly.

Now here's the cool part, we are shooting to have it done and shaken down so that he can take it to the Northern Ohio Chevelle Show this coming August. I want to travel with him to the show but may have a personal obligation that will not allow it.
 
Last edited:
I forgot to post this video of startup after we got the engine sorted out. This was before upper cowl repairs were completed and interior cleaned up.
 
Last edited:
Top Bottom