What's new
Old Chevelles

Welcome to OldChevelles.com, built by Auto Enthusiasts for Auto Enthusiasts. Cars are not our only interests so please feel free to post about any subject the community might enjoy or you just feel you need to air.

We respect free speech and constructive dialogue however we don't allow threatening talk against members, nudity, or pornography. Threads are monitored and trolls are not tolerated.

This site is completely free and there are no costs. Please enjoy and provide feedback.
  • We've enabled the website app for anyone who wants to use it on a mobile or desktop device.

  • We've changed the header logo to display our Member's Cars.

    If you'd like your car to show up there, go to the forum Site Bugs & Feature Requests and post your image in the "Member's Car Pictures for the Header Logo" and we'll add your car into the lineup.

Building Our Barndominium

As I mentioned before, I don't sand the walls when I tape and mud. Light successive coats is all I do, and these are my results. This is a bed coat, mid fill coat, and top coat. I have probably 2 to 3 more days of touchups and doing corners before I texture the ceiling with a medium knockdown and orange peel on the walls, then PVA primer to seal and prime. Lisa is picking out the paint colors for each room. She initially wanted me to spray it all the same color, but I told her it won't get painted again for 10+ years, so she'd better pick what she wants now.
PXL_20231030_193727668.jpg
 
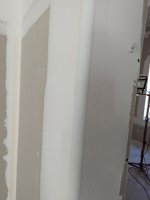
Unfortunately I've had to do some sanding (even had to go out and buy a screen sanding pad). We elected to put rounded corners at just about every outside corner and those do not lend well to scraping the excess off the corners when mudding, but we like the rounded corners so much more than standard sharp corners and to me specifically details matter. It's the difference of what looks good and what looks outstanding, but it does require about triple the work to get them perfect. This is 2 coats of mud and will likely require 2 more light coats, but again, to me, details matter.

PXL_20231101_151245547.jpg
 
A guy I worked with had them do rounded corners in his house. Said the drywall guy was a meth head but did excellent work when he showed up.
 
A guy I worked with had them do rounded corners in his house. Said the drywall guy was a meth head but did excellent work when he showed up.

We had them at our last house. I spec'd them to the builder, but he said they would only do it in specific areas because they are a pain to do and take alot more time.

This time the only area that's not getting rounded corners is the closet openings which use regular corners and then door casing overlaps it to hide the opening of the bifold door.
 
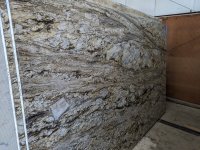
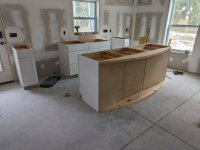
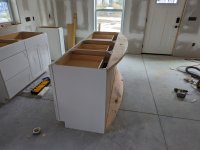
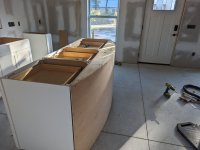
Had to install the base cabinets so the granite place can come out and template for the tops. The island was fun to cut a 7' arch that bumps out 8". The island granite will extend 1' out in front and on the sides (extra charge to embed steel supports underneath for a cantilevered granite top), so the island top will be 9' wide and 45" at the bowed front. Big piece of granite, and we had to pay an extra charge for 3 guys to install it.

All I have left is to build a framework for the 1/4" luan to attach to the bowed front, and then attach the luan. Later I'll use doorstop to box out the front to keep with the shaker style cabinets.

I've been doing something I never do and that's sanding the mud. Lisa hasn't decided but, she thinks she may want smooth walls and that calls for sanding so it's ultra smooth. I hate sanding and it sucks, but Lisa gets what she wants if she puts up with me.

PXL_20231109_161048807.jpg
PXL_20231109_161056864.jpg
 
Last edited:
Countertop template is done. It was all done computerized with a laser site to multiple points on all the cabinets. Interesting. Last time we had granite countertops done, they did it with luan and cardboard taped together representing the actual countertop.

Tentative install date is December 11th. That gives me 1 day to install the plumbing and call for CO inspection, and if everything goes good, we'll get CO on December 13th. Gonna be a hard push but I'll be ready.
 
Been busy for days (more like months and months), but I pushed hard to get some things done that would hold me up later.

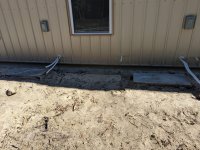
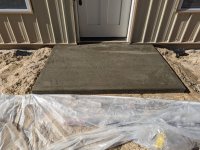
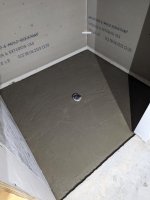
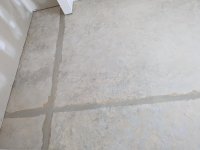
Poured the concrete pads for the minisplits (4 of them), poured the front step, and filled the master bath shower with 2" to bring it just a bit higher to make it a zero entry shower with a mud pack base.

Thirty six (36) 80 lb bags. Glad I had a concrete mixer otherwise that would have sucked mixing it by hand.

PXL_20231129_164703988.jpg
PXL_20231129_164655372.jpg
PXL_20231129_164611683.jpg
PXL_20231125_152152077.jpg
 
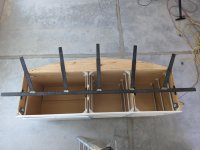
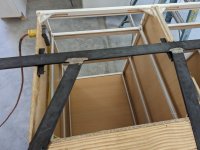
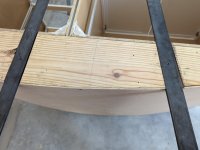
Knew the granite people would be pushing (I suspected) and I was right. Got a call yesterday at 4:30 pm that they wanted to install the granite on Friday the 1st. Luckily I had already built the support for the island, but needed router it in and to secure it to the cabinets.

It's 3/8" x 2" steel stock welded to support the granite overhang (which is 1' overhang), and 1" angle welded to the bottom of the 3/8" bar to secure it to the cabinets. Pretty sure these guys will be blown away since they use a bought solution that's 3/16".

PXL_20231129_164421616.jpg
PXL_20231129_164452732.jpg
PXL_20231129_164447128.jpg
 
Shallow duplex recep/switch outlet box? watch for putting too many wires in a shallow box, they have CU IN rating stamped into the back of boxes for how many wires can go in legally

14/2 or 12/2 in the shallow box is standard, but anything more and there aren't enough cubic inches for space. Since all the 15 and 20 amp circuits in the house are ARC and GFI protected at the panel, I can install a standard receptacle.
 
I think it’s a newer code All breakers need to be Arch Fault in bedrooms, living rms? and wet location like kitchen & bath, garage & outdoor receps on GFCI has been code a long time
 
Top Bottom