What's new
Old Chevelles

Welcome to OldChevelles.com, built by Auto Enthusiasts for Auto Enthusiasts. Cars are not our only interests so please feel free to post about any subject the community might enjoy or you just feel you need to air.

We respect free speech and constructive dialogue however we don't allow threatening talk against members, nudity, or pornography. Threads are monitored and trolls are not tolerated.

This site is completely free and there are no costs. Please enjoy and provide feedback.
  • We've enabled the website app for anyone who wants to use it on a mobile or desktop device.

  • We've changed the header logo to display our Member's Cars.

    If you'd like your car to show up there, go to the forum Site Bugs & Feature Requests and post your image in the "Member's Car Pictures for the Header Logo" and we'll add your car into the lineup.

Dash board hack.

IF you are flexible enough you can reach the button for the headlamp switch from under the dash, it is not easy and you may have to move a few items out of the way. The A/C vent will be the worst to deal with. Once the rod is out you have it made, just disconnecting the wires but they have slack.

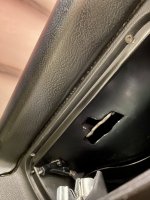
Can you post a pic of the inside of the glove box where the screws are?
 

Attachments

  • 7F28AF3F-E3D1-4CC8-8AC8-6CFA63AC5E0B.jpeg
    7F28AF3F-E3D1-4CC8-8AC8-6CFA63AC5E0B.jpeg
    141.1 KB · Views: 8
Almost considering sacrificing the dash pad, going on right above the screws with an ocsilating saw and cut them . Would have to replace the pad. But if the screw anchors are stripped anyway, what would be another option?
 
I doubt if they are screw anchors or solid tapped metal.....they're likely a spring metal u-clip that has some movement to it. So, removing the pad and replacing that clip would be a routine fix.
 
Okay, that's different, apologize for being slow. I'd do the burr bit then, just be careful, jab it then let it cool, repeat until the head pops. Then smoke a cig.
 
This may be easier ; take something thin and press it against the screw (under the head) to keep it from turning.
While pressing sideways, drill the center of the screw with a 1/8" or smaller drill bit until the head pops off
 
This may be easier ; take something thin and press it against the screw (under the head) to keep it from turning.
While pressing sideways, drill the center of the screw with a 1/8" or smaller drill bit until the head pops off
Those tapered screws are in tight . No way to slide anything under the head without cracking the dash plastic.
 
The pad can be repaired with epoxy and holes retapped, the dash cannot. remove the glove box door and carefully drill the head off, like you are doing.
 
I'm curious how this turned out. I think I would have drilled out the center with the appropriate size bit. Enough for the head to separate from the screw shaft. Once everything was apart, a small pair of vice grips on the screw and twist it out.
 
The job is complete. Keep in mind the screws used here were a round head Allen head. So the head was deep. Anyway I used a burr bit to start. Drilled it to what I thought was to outside of the screw shaft. Then went to a real good sharp drill bit. Started drilling while at same time putting lift pressure on dash pad . When the head popped off the dash lifted. Off it came. Now for the kicker. What they had done was used a lock nut. I could not reach all the way around the glove box and feel them. If I would have known I could have felt my way with a 1/4” socket possibly. Or pulled the glove box. Jeez, I just wanted to change my headlight switch . A 15 minute job!
 
Top Bottom