Inlet and outlet fittings, the lowest should be no more than 90 degrees off top center.
Old Chevelles
Welcome to OldChevelles.com, built by Auto Enthusiasts for Auto Enthusiasts. Cars are not our only interests so please feel free to post about any subject the community might enjoy or you just feel you need to air.
We respect free speech and constructive dialogue however we don't allow threatening talk against members, nudity, or pornography. Threads are monitored and trolls are not tolerated.
This site is completely free and there are no costs. Please enjoy and provide feedback.You are using an out of date browser. It may not display this or other websites correctly.
You should upgrade or use an alternative browser.
You should upgrade or use an alternative browser.
Vintage A/C
- Thread starter Shovelrick
- Start date
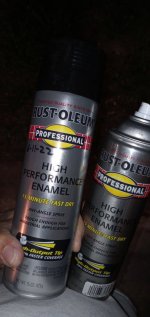
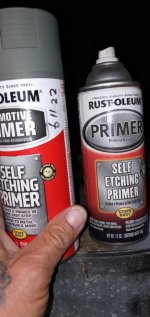
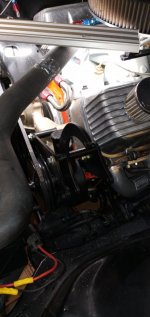
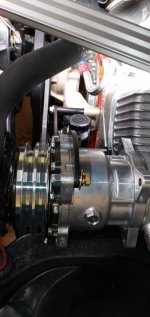
Maybe I should put this somewhere else? but I test fit the brackets and all good so I cleaned the bare metal with min spirits then heated a little with my heat gut thinking thatll cook off any machining oil and help primer to stick, well 3/4 can of self etching primer and half can of Rustoleum Pro were a no spray and I wasted time trying to clean tips lol, soo after saying F this went to HD and dropped over $20 for 2 cans of spray bombs...damn and now Im dating my cans so I know how old they are, mine do sit on the self awhile lol
Attachments
I guess top most part would be best?Inlet and outlet fittings, the lowest should be no more than 90 degrees off top center.
kmakar
Janitor
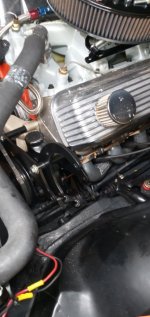
On bare metal like brackets, I always spray clean with brake clean to make sure any oils (even from your hands) are removed, then I spray.Maybe I should put this somewhere else? but I test fit the brackets and all good so I cleaned the bare metal with min spirits then heated a little with my heat gut thinking thatll cook off any machining oil and help primer to stick, well 3/4 can of self etching primer and half can of Rustoleum Pro were a no spray and I wasted time trying to clean tips lol, soo after saying F this went to HD and dropped over $20 for 2 cans of spray bombs...damn and now Im dating my cans so I know how old they are, mine do sit on the self awhile lol
Yes, best if the fittings are at the top. If you need angled fittings, ebay seller johnjoysyl will have everything you need to make it as clean as possible.
The VA kit came with fittings on the hoses on 1 end and the other 2 fittings loose in the box to measure hoses (Premade Kit?) then cut to size and have the fittings Bead Crimped on the hoses, there's a Goodyear Hose store nearby that will do the crimping and I haven't looked at the fittings yet but will be today after I finish painting the brackets, bolt them on and mount the compressor, going to look back at the pic since the power steering pump and comp have a belt adj. slot does 1 belt run both PS and comp? and what's the best way to adjust the belt if only 1 ? Funny when I was young the first thing that got removed if a car had ac was the belt LOL
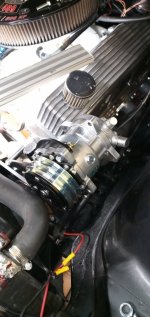
Been about a week since Ive been able to get here to do any work but finally got some paint I was happy with its Krylon satin black and dries a lot quicker than the 2 day Rustoleum Pro, so got the brackets mounted and decided I wanted grade 8 bolts in a few places instead of the supplied bolts and going to wait till its ready to turn on before putting a belt on it so just put the PS belt back on for now, EDIT I know lock washers should be on nut side but these nuts are Nylok nuts and the lock washer is also being used as a spacer since the bolt is a little long and to close to pulley and I didnt feel like cutting 1/8-3/16 off ")
Attachments
Last edited:
There should be 3 belts :

I have the pullies that came off the RV 454, wide Crank, WP & Alt so I guess that takes up 2 V belts, wonder if it'll be ok with 1 V belt on the PS pump & Comp?...Hum probably till 5,000+ RPM then Belts-A-Flyin LOL EDIT Inst says 58.5" to 59.5" belt
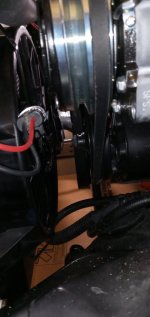
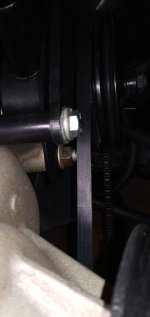
It looks like the belt on groove #1 that goes around the ac comp and ps pump doesn't have a lot of contact with the pulley on the ps pump.I have the pullies that came off the RV 454, wide Crank, WP & Alt so I guess that takes up 2 V belts, wonder if it'll be ok with 1 V belt on the PS pump & Comp?...Hum probably till 5,000+ RPM then Belts-A-Flyin LOL EDIT Inst says 58.5" to 59.5" belt
If there is no belt in groove #2, I think the ps pump will not develop enough pressure to work.

Maybe I should switch back to the V belt Alt & WP pullies..?
What kind of setup are you running ?Maybe I should switch back to the V belt Alt & WP pullies..?
Stock 86 Winnie 454 pulleys with 2" flat belt for Crank, WP and Alt with V belt for PS and AC, thinking on an Alan Grove system
Wow, never heard of mixing serpentine and V-belts in same system.Stock 86 Winnie 454 pulleys with 2" flat belt for Crank, WP and Alt with V belt for PS and AC, thinking on an Alan Grove system
I guess something Winnie came up with? Lol I do have a regular pulley set up that wouldnt need me to send the comp back for a serp pulley comp
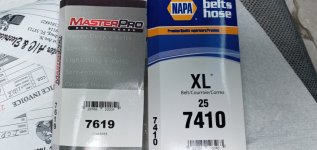
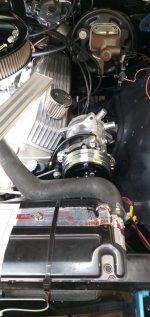
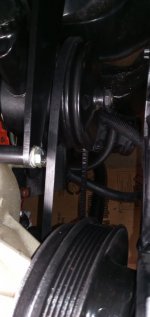
Found there's a separate belt that only goes from crank to PS pump, most inward pulley then next outward pulley drives Crank, WP, PS pump and AC then last outward is a 1" or 1.25" flat belt for Crank, WP and Alt., ran a piece of 14/4 ext wire around and got 40" & 62" then bought belts but at least an inch too short so back to Napa lol
The diagram says the middle belt drives the PS pump ? That would be the outer groove on 2 groove pulley on the pumpFound there's a separate belt that only goes from crank to PS pump, most inward pulley then next outward pulley drives Crank, WP, PS pump and AC then last outward is a 1" or 1.25" flat belt for Crank, WP and Alt., ran a piece of 14/4 ext wire around and got 40" & 62" then bought belts but at least an inch too short so back to Napa lol
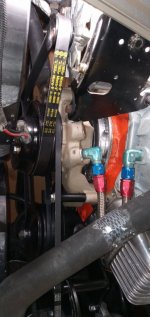
The 1st groove belt goes around the ac and ps pump and the crank
Not sure if this diagram is correct. Need a 69 assembly manual

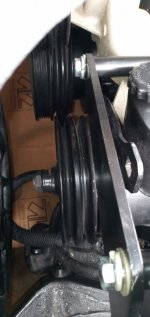
It looks like I cant go by a Chevelle manual, my pulleys being from a Winnie I guess will end up being an odd ball, test fit belts till I find a combo that works out best for future adjustments as belts stretch, next Im trying 42" for Crank to PS pulley and 63" for Crank, WP, PS and Comp, I forgot to take pics earlier but I'll take some next go at it
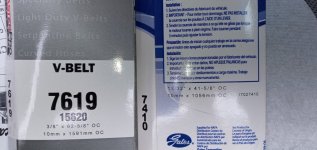
Well went to another Napa that had bigger 3/8th wide belts and got 43" and 63" and both are way too big lol, Im going back tomorrow and buying every size from 40.5" to 42.5" and 61.5" to 62.5" and something will have to fit lol, Oh and fun part is WP pulley has to come off to get Crank to PS belt on  Hot Roddin lol
Hot Roddin lolAttachments
Finally got some belts to fit, Id rather stayed with Napa USA belts but no luck on ac belt so went to Orielys for a 62 5/8" for ac and Napa 41 5/8 for Crank to PS pump, I think 62" would be perfect for ac so Ill keep looking for that but this works for now, next is test fitting evap under dash, cutting firewall hole and I did look under dash and still have orig defrost duct Yea! Lol