What's new
Old Chevelles

Welcome to OldChevelles.com, built by Auto Enthusiasts for Auto Enthusiasts. Cars are not our only interests so please feel free to post about any subject the community might enjoy or you just feel you need to air.

We respect free speech and constructive dialogue however we don't allow threatening talk against members, nudity, or pornography. Threads are monitored and trolls are not tolerated.

This site is completely free and there are no costs. Please enjoy and provide feedback.
  • We've enabled the website app for anyone who wants to use it on a mobile or desktop device.

  • We've changed the header logo to display our Member's Cars.

    If you'd like your car to show up there, go to the forum Site Bugs & Feature Requests and post your image in the "Member's Car Pictures for the Header Logo" and we'll add your car into the lineup.

'69 Malibu 4-Door Project

Yea, I don't believe it either. What I *am* worried about now is matching pinion angle.... we'll see.

307 frame pads on the way, should have them Thursday.
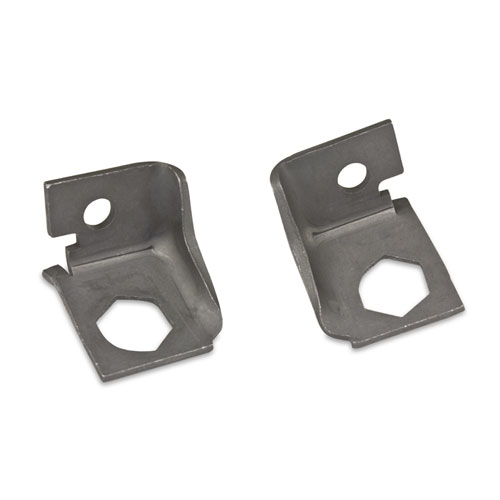
Group 0.028 - Frame Stands
3980707 L.H./3980708 R.H. ~ 1968-1972 307
View attachment 14673

EDIT: Weavers had the correct 307 mount. I made the guy check it was a different P/N than the 350 mount, which it was.

Also, Summit had one they say is correct for the 307: Anchor Industries Engine Mounts 2267

EDIT2: The Anchor 2267 mount has the 'lock', the Anchor 2142 does not.
The mounts will play with pinion angle, for a non 307 engine you really need the correct frame mounts.
 
They'll play with the front u-joint angle, but I think it's too little to worry about. Jacking the rear up 2 inches makes a similar effect. I have never looked for the correct mounts in oem style only urethane, but chevy introduced the 307 in '69 when it became mandatory for caged or secure mounts to not allow seperation. Seems someone should offer the oem stuff, maybe RockAuto?
 
They'll play with the front u-joint angle, but I think it's too little to worry about. Jacking the rear up 2 inches makes a similar effect. I have never looked for the correct mounts in oem style only urethane, but chevy introduced the 307 in '69 when it became mandatory for caged or secure mounts to not allow seperation. Seems someone should offer the oem stuff, maybe RockAuto?
I found firewall to transmission to be tight. Again, crap like this broke me from being a modification guy.

Remember, many 307 cars had Powerglide transmissions.
 
New Update or The End of Part One: A bunch has been done since my last update.

Received and installed the correct 307 frame mounts(had to remove the lower control arms to get at the bolts!), the correct 307 motor mounts (Anchor Industries Engine Mounts 2267) and got the engine/trans installed. Note these 2 pix. The first shows both the frame and motor mounts correctly installed. Now look at the distance between the pan and the cross member. I didn't look before but trying to make the standard mounts work would probably have put the pan pretty close.
20230922_133003.jpg

But I still do not understand what the difference is between a 307 block and all the others. Check this next pic.
20230922_133229.jpg
Considering that bolt has a 9/16" head, it appears to be about 2-2.5 lengths of that head to the pan mounting surface, which would make it about 1 1/2" from the bottom MM bolt hole. If somebody has access to a *normal* small block I'd be really interested to see if you get a different measurement.

Anyway, next up is getting those $%@*($^!*^*& front springs in. Used a 1/2" ACME threaded rod and brazed 2 nuts to the bottom and a specially constructed plate. Rod goes through the upper shock mount hole with a large well lubricated washer and nut. Now that the engine/trans is in, we should have enough weight to hold the front end down while compressing the spring *just* enough to get it into place, and then used a specially constructed 4x4 to wedge under the control arm. Then letting the lift down will push the arm up enough to get the lower ball joint in.... for the most part it worked!
20230922_163014.jpg
20230922_162710.jpg
1/2" Impact through the bottom and the owner holding the nut on top. Getting the spring in correctly proved a little problematic (is it seated on top? Is it correctly located in the bottom arm?) but we got it after 2 attempts. We only needed to strap the frame to the lift and the owner still had to hang off the frame horn for me to get the ball joint nut started. How did they do this at the factory?

Once we got the springs in things moved fast so I didn't get many pix. Disk Brake conversion kit, Idler Arm, Drag Link (I love that term!), Tie Rods, etc. Tonight we got it to roller status and is the end of this part. We're not in panic mode yet but the guys who had offered to help with the body swap have backed out. I really want a 2 post lift but the owner is considering doing it in his driveway, using 4x4s and floor jacks.....! I shudder at the thought!
20230926_193501.jpg
20230926_193509.jpg
20230926_193518.jpg

Dig the El Camino tailpipes!
 
Last edited:
I *am* having an issue with the front brake lines, specifically how and *where* the rubber brake hose mounts to the chassis. If somebody could take a pic of both inner fender wells showing where the rubber hose mounts to the frame I would greatly appreciate it!
 
On the frame, just behind the control arms there's 2 5/16" holes, 1 threaded, one not, they're about 3/4" apart......that's where an "L" bracket is bolted which holds the end of the hard line. So, just locate the end of your hard line and look for those holes. You probably removed that bracket and just forgot to put it back???
On the threaded rod through the spring, you've got the right idea for getting the spring in there, but once you've popped the spring in, just let the lower control arm relax in it's extended state, the spring won't pop out.....but if you're scared it will, secure it with rope or something......unnecessary really. Now just remove your threaded rod and reattach it through the lower control arm........and impact away. Simple, and you don't need any weight sitting on top of the frame this way.
 
This was the frame as we got it, drum brakes in front.
20230813_080217.jpg
20230815_181813.jpg

...and these are the brackets I have. Old and the new one from from the conversion kit.
20230928_090604.jpg

The hose that came with the kit seems a little long... so long in fact that it would comfortably go a good inch above the frame rail. If I attached it to where the old drum brake hose went it would hang below the lower control arm!
 
So here's the Biggie update.... Body on the Elky chassis! An old employer of mine agreed to let me use his two-post lift to do this swap, so off we went.

The crap part of this is..... we only had access to one truck and one trailer, meaning 2 trips each way, one to pull one unit over then go back to get the other and then taking both back. The trailer barely made the grade and the only "Winch" we had was a pull-a-long that only pulled a chassis 4 feet at a time (4-ton rated) before needing to be re-wound... what a pain, but it worked! It just took a lot of time to load and unload.

Here's "Le Monstre", as we like to call it, on the tralier ready to go it's castration... heh!

20231006_192953.jpg

And a pictoral series of the operation.

20231007_101404.jpg
20231007_104912.jpg
20231007_104920.jpg
20231007_105137.jpg
20231007_111823.jpg
 
Last edited:
Now the Transfomation.... actually this is a lot of fun for me!

I had this idea early on to maybe try and use guide pins to line up the body and chassis during reassembly. I came up with an idea of using threaded rod, screwed into the body mount nuts, to guide the frame into as the body is lowered into place. My local hardware store only had stainlees rod in the size we needed so only made two (costs ya know) and threaded one into the left front and the other into the right rear mounts.

20231007_164211.jpg
20231007_164147.jpg

It made it incredibly easy to line body and frame up!
20231007_164942.jpg
Those are 18" long prolly could'a made them shorter.

Anyway, it werkt the treat! Much easier than layin on the floor yelling at people to "move it up and to the right... No the other way!'... etc. lol!

Back in my workshop now putting away all the little things... ya know, trans lines, vacuum lines, shifter linkage (Thanx to Watkin's Salvage!) Getting "Pre-Bent" lines to work (ie. Pipe Cutter/Tube bender/ Flaring tools), etc. etcetera!
20231008_092709.jpg
20231008_100742.jpg
20231008_100800.jpg
 
BTW, I fig'rd out that truck chassis is from a '74 (Aug 73) K20 Short Bed, the engine is a '80 350 4BBL. It's For Sale now... whadda you'all think it's worth?

I mean, it's all setup for a 4-door *or* Elky body, it otta be worth sumthin! lol

Block Casting is 3970010 and is a desirable block, don't know if it's 2 or 4 bolt.
20231007_105922.jpg

TH350
20231007_105936.jpg
20231007_105949.jpg
20231007_110022.jpg

Engine Stamping
20231007_110420.jpg

Frame Stamping
20231006_171259.jpg

Transfer case tag
20231006_161428.jpg
 
Last edited:
$150 might get someone to take it off your hands. I kid, I kid.

A truck frame is worth something especially if it’s got 4x4 parts but unless it’s super easy to convert back to usable under a truck I’d imagine finding someone who wants to put a car body on it would be difficult.

You work fast. Keep us updated. I like your project.
 
Actually it'd be pretty easy to revert it back to truck status. The risers that were welded onto the frame are easily cut off and the original body/bed mounts are still there.
 
If that’s the case I’d chop them off and just advertise it as a K20 frame. Someone probably wants to turn their C10 into a 4x4.

Advertising it as frame set up for an El Camino might turn off some people even if it’s not a big deal to convert it back.
 
True, I get your point. Hoping to get the Black Beauty running and drivable this weekend. We can then turn our attentions to wackin off those mounts.
 
Not sure what it's value is, but there certainly is a market for a good frame. It's a K10 though, all K20s were long beds.
 
Yes and no, there's probably more shortbed builders, but the money is in the running gear, 14 bolt rear, dana front and 205 transfer. There's plenty of demand for all the 1/2 ton stuff for the guy either modding their 2 wheeler or replacing rusted stuff.
 
Top Bottom