Old Chevelles
Welcome to OldChevelles.com, built by Auto Enthusiasts for Auto Enthusiasts. Cars are not our only interests so please feel free to post about any subject the community might enjoy or you just feel you need to air.
We respect free speech and constructive dialogue however we don't allow threatening talk against members, nudity, or pornography. Threads are monitored and trolls are not tolerated.
This site is completely free and there are no costs. Please enjoy and provide feedback.You are using an out of date browser. It may not display this or other websites correctly.
You should upgrade or use an alternative browser.
You should upgrade or use an alternative browser.
What’d you work on today?
- Thread starter JohnC
- Start date
Richard150MPH
Veteran Member
Finally finished fabricating the new bases for the two post lift.
Solid 2" bar stock was unobtanium/super expensive, so I had to make do.
5/16" wall heavy 2" square tube I just lucked out in having around is now welded up.
Milled some 1-3/4" square bar stock I had into slugs that I snug-fit inside the tube where the anchor bolts will go.
Used the vertical mill to punch holes through everything.
I now have the weak side column standing upright near its final position.
Missed my Sunday completion goal but at least I am getting close.
Buying the generator to run it from in the morning.
kmakar
Janitor
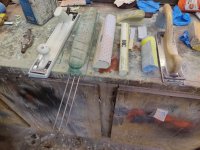
....back in epoxy, I know, whatever......
Why did you say "I know, whatever"? Did you think we'd not be interested? I can't vouch for anyone else, but I'm following intently as I've never done what you've done in regards to replacing so much fiberglass, and I think it looks great.
I also am interested in what you're doing with that Curvaceous Beauty, I had the chance to learn Body & Paint from Pro father (Great Frame man) & son (son was 1 of my best friends from 72 to late 80's) but was only interested in mechanical stuff which I still learned a lot from those gearhead guys
John mentioned that it must be a nightmare to block sand a car with so many curves !....back in epoxy, I know, whatever......
What tools do you think I need to block sand a car like my 68 Camaro ?
What about this ?

Kevin, not at all....my comment was expressing the minor, if noticable at all, differences in the pics I've posted. Appreciate the interest as always.
Beth, that block is far too bulky and not something I'd use, think that Christmas gift you get and know it'll never migrate out of the closet. I use Ames and Hutchins blocks, not available anymore AFAIK, that and a couple 3m blocks that look much like Durablocks, but only for certain tight areas. Will never use Durablocks again, they leave noticable innacuracies.
Curvy beauty, yes, but like all those, HIGH maintenance!
Last edited:
So you use much smaller sanding blocks ? Something like this 3M kit ? ($138 at Amazon)Kevin, not at all....my comment was expressing the minor, if noticable at all, differences in the pics I've posted. Appreciate the interest as always.
Beth, that block is far too bulky and not something I'd use, think that Christmas gift you get and know it'll never migrate out of the closet. I use Ames and Hutchins blocks, not available anymore AFAIK, that and a couple 3m blocks that look much like Durablocks, but only for certain tight areas. Will never use Durablocks again, they leave noticable innacuracies.
Curvy beauty, yes, but like all those, HIGH maintenance!

I use that round block, the third one, 12 in. long.....and one that's shaped like a teardrop from a profile view, also 12 in. long. These are only for this project, never found them useful on a steel body with less than crazy curves. Switched over to hook/loop on most blocks other than my hand made stuff.
Derek69SS
Veteran Member

Put a shift-kit in Cale's Grand Prix to help make the 4T65E last longer. Also did oil change, and installed new snow tires on it.
I need to pick up some rear brake pads, and new valve stems to replace one that started leaking before we put it back together.
Also need to pull the ignition switch to solve a problem with the HVAC.
His appointment for his driver's test iS December 4th.
Cutting clear…..
Kevin, or other paint people….. what’s the best block for sanding clear? I’ve got a very firm foam block or could use a piece of clear acrylic. Also have a thin hard rubber block. I don’t think I need to cut very much. Last night I was checking it out and was surprised how much it seems to have self leveled.
I saw a YT video where a guy was using sander - forgot if rotary or random orbital or DA to dry sand clear. I don’t have enough to make it worthwhile learning a new technique but it was at least interesting.
I know 3m Trizact has been extremely popular but at $3 per disc a little too rich for my blood especially since you have to buy 15 at a time and then you only get 1 grit.
Also saw another video where a guy swore by using a denim pad on a rotary buffer to cut orange peel in the clear.
Nice soft top. Who's is that?View attachment 16117
Put a shift-kit in Cale's Grand Prix to help make the 4T65E last longer. Also did oil change, and installed new snow tires on it.
I need to pick up some rear brake pads, and new valve stems to replace one that started leaking before we put it back together.
Also need to pull the ignition switch to solve a problem with the HVAC.
His appointment for his driver's test iS December 4th.
I've always used my ducky, or palm foam block. I start out with the minimum grit possible, usually a very light 1200, followed by a thorough 1500, then 2000. I'm going to invest in the trizak, as I could probably cut the time down to 20% or so. Thoroughly dry after each grit to expose your work.Cutting clear…..
I’m actually wondering if I should do my first cut with 1000 or 1200 dry. The benefit would be I’d be able to see how the orange peel is looking without having to squeegee the surface. I’m not trying to perfectly flatten, just even out the inconsistent levels of peel.
Your paper will load up, and that can easily score your finish. Just cut a sample section with water and a drop of soap, then dry and assess. Also, soak your paper for a half hour.....can't soak it too long, so plan ahead.
I do the same thing, 1200 just to cut the highs, not to flatten.
I do the same thing, 1200 just to cut the highs, not to flatten.
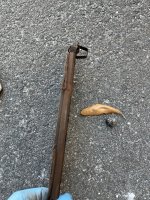
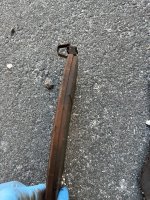
Who comes up with this Silly Shit? My 17mm open ended wrenches are too fat to fit in here, I’m assuming the nut needs to be held with a backing wrench to remove the pin? Guess I’ll YouTube it lol
Attachments
Last edited:
Derek69SS
Veteran Member
It is a 65 Chevelle that belonged to my friend Dan who passed away a couple years ago. I'm fixing some driveability issues for his wife Cathy so she can enjoy it.Nice soft top. Who's is that?
Dan tore it apart about 10 years ago and got carried away with the project, doing a ~500hp 383, TH200-4R, Holley Terminator EFI, Vintage Air, etc... he didn't quite get it put back together when his health declined and he passed. Cathy had help from friends and neighbors to get it back on the road, but it's a little over their heads to really get it done right. Since they lived 1.5 hrs away, I decided the only way I can really help is to bring it home and work on it over the winter.
Dan was on Team Chevelle as "Will02"

Chevelle_Nut
Shop Foreman
Brrrrr.....