Total Seal makes regular style rings too. Had a set of old Total Seals in a BBC in about 77- 78 they were oil burners.Can you even file fit total seal rings?
Old Chevelles
Welcome to OldChevelles.com, built by Auto Enthusiasts for Auto Enthusiasts. Cars are not our only interests so please feel free to post about any subject the community might enjoy or you just feel you need to air.
We respect free speech and constructive dialogue however we don't allow threatening talk against members, nudity, or pornography. Threads are monitored and trolls are not tolerated.
This site is completely free and there are no costs. Please enjoy and provide feedback.You are using an out of date browser. It may not display this or other websites correctly.
You should upgrade or use an alternative browser.
You should upgrade or use an alternative browser.
489 BBC Build Thread
- Thread starter Nashville Cat
- Start date
Made some decent progress today. The main bearing clearance is .003" which is ok (I'd prefer .0025). The thrust is .007 - good.
I wasted half the day finding some plastigage (went to 4 different auto parts) and different items needed for assembly.
The crank is in and caps torqued. The rear main seal was installed per Fel-Pro instructions (3/8 offset).
I have a new set of rings so hopefully the gaps will not need much.
Checking the ring gaps, installing rings and pistons/rods next.
Curious your install mo on the rear main?? Mine leaks, offset, dab of rtv on the mate, and anaerobic on the metal.
I used the Fel-Pro 2904 silicone rear main seal.Curious your install mo on the rear main?? Mine leaks, offset, dab of rtv on the mate, and anaerobic on the metal.
I didn't put any rtv on the ends where the 2 halves meet.
I did put rtv on the main cap horizontal joint (light coat) under the outside edge.
Fel-Pro said to install the seal rotated 3/8" from the joint so I did do that.
Seems you did everything right and it shouldn't be leaking.
I debated using the Viton seal. If mine ever leaks I'll be trying the Viton one next.
Last edited:
I might have missed it but you can file fit Total Seal rings they’re just very hard metal per the pro engine builder that assembled my 489
I bought a correct set from Hastings (plasma-moly) and checked one top and one 2nd ring last night.I might have missed it but you can file fit Total Seal rings they’re just very hard metal per the pro engine builder that assembled my 489
They had the perfect gap - .019" !
So hopefully it looks like I won't have to file any rings.
Last edited:
When I rebuilt a few HD engines I’d use a 1/2” socket as a gauge to push rings down from the top of cylinder and go around to be sure the ring was even down the bore then check gap, can’t think right now what S&S rec’d but MC’s are probably a little different anywayI bought a correct set from Hastings (plasma-moly) and checked one top and one 2nd ring last night.
They had the perfect gap - .019' !
So hopefully it looks like I won't have to file any rings.
LOL, that's what I was doing yesterday !When I rebuilt a few HD engines I’d use a 1/2” socket as a gauge to push rings down from the top of cylinder and go around to be sure the ring was even down the bore then check gap, can’t think right now what S&S rec’d but MC’s are probably a little different anyway

I was using a small socket to push the ring down the same at different points. Worked good.
The rod clearances are good (.002"). Checked them with green plastigage.
Having trouble with the spiro locks assembling the pistons to the rods.
Just watched another video; I think I got it figured out LOL
Having trouble with the spiro locks assembling the pistons to the rods.
Just watched another video; I think I got it figured out LOL
Thanks, I'll try that tomorrow.
I feel defeated right now as I can't get any pistons/rods connected !
I think those spirolox videos are like watching guitar videos - they tell you how easy it is to do.
I broke down and ordered this tool (my wrist pins are .990") :

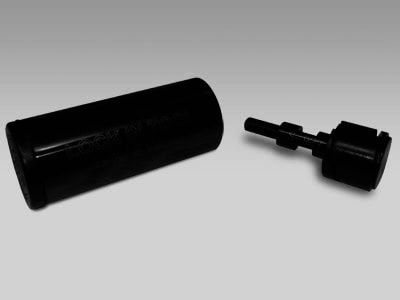
I broke down and ordered this tool (my wrist pins are .990") :
Steel Spiral Interchangeable Head Lock-In-Tool
The Lock-In-Tool makes a tough job installing wrist pin locks, both spiral lock and wire lock, easier than ever. Check out the "How-To-Use" portion to see for yourself what all the buzz is about.
www.lockintool.com
Did you choose the full floaters for diy install?
I've never attempted the spiro locs, but it seems real easy if you've got sturdy finger nails. Picking them out may me a bit more difficult.
I've never attempted the spiro locs, but it seems real easy if you've got sturdy finger nails. Picking them out may me a bit more difficult.
They are full floaters with .990 pins. Installing the spiros in the videos sure does look easy.Did you choose the full floaters for diy install?
I've never attempted the spiro locs, but it seems real easy if you've got sturdy finger nails. Picking them out may me a bit more difficult.
There must be a reason they don't use C-clips ? That would be super easy.
If I had to guess, c-clips would allow the pin to bump against it and eventually harming the groove land. Spiro locks by inner tension would keep the pin centered.
If I had to guess, c-clips would allow the pin to bump against it and eventually harming the groove land. Spiro locks by inner tension would keep the pin centered.

After receiving the spirolox install tool, I got the first few locks installed and then started bending them.
So I went back and tried to do it by hand and finally found a method to get them in.
Today the replacement locks arrived and I installed the last piston on it's rod.
So next I checked the ring gaps and they were ok - .019" on the top and 2nd rings.
Installed the rings in the correct orientation and used GM EOS assembly lube on the bearings and a 10% mix (EOS and SAE 30W) on the cylinder walls.
This piston install cylinder is a life-saver. Makes it too easy :

All pistons are in. Rod bolts are hand tight

The crank-turning socket is another must-have !

So I went back and tried to do it by hand and finally found a method to get them in.
Today the replacement locks arrived and I installed the last piston on it's rod.
So next I checked the ring gaps and they were ok - .019" on the top and 2nd rings.
Installed the rings in the correct orientation and used GM EOS assembly lube on the bearings and a 10% mix (EOS and SAE 30W) on the cylinder walls.
This piston install cylinder is a life-saver. Makes it too easy :
All pistons are in. Rod bolts are hand tight
The crank-turning socket is another must-have !
Last edited:
I just remembered something I have wanted to check for a long time.
I put a dial indicator on piston #1 and rotated it to the top until it was just starting to go down.
Checked the piston deck height - it was zero ! I love it; I bought this block not knowing how much had been done and this will help the compression
and the quench will be perfect.
I also checked piston #8 and got the same thing. Very happy
The only thing I can think of that might cause problems was if it was line honed, which could cause the timing chain to be loose.
But I never saw any evidence of that so I think I'm good.
I was going to ask that, but studied the pics and since it's been decked, just assumed it'd be 0. It's never 0 across the board, usually 1,2, or even 3 thou down across the deck.
How's your forefingers?
How's your forefingers?