What's new
Old Chevelles

Welcome to OldChevelles.com, built by Auto Enthusiasts for Auto Enthusiasts. Cars are not our only interests so please feel free to post about any subject the community might enjoy or you just feel you need to air.

We respect free speech and constructive dialogue however we don't allow threatening talk against members, nudity, or pornography. Threads are monitored and trolls are not tolerated.

This site is completely free and there are no costs. Please enjoy and provide feedback.
  • We've enabled the website app for anyone who wants to use it on a mobile or desktop device.

  • We've changed the header logo to display our Member's Cars.

    If you'd like your car to show up there, go to the forum Site Bugs & Feature Requests and post your image in the "Member's Car Pictures for the Header Logo" and we'll add your car into the lineup.

1966 LS swap

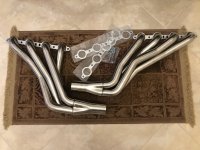
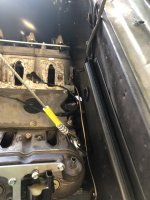
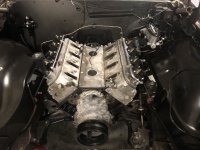
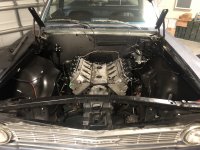
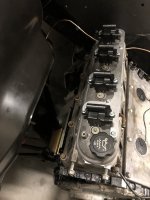
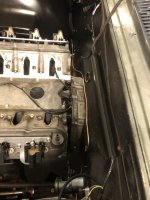
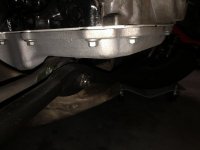
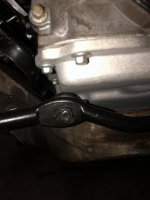
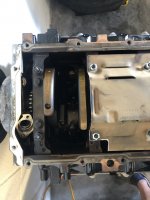
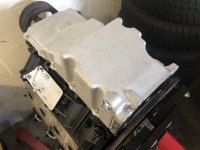
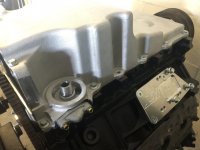
Windage tray cut. Pan checked and installed. Fit is good, holes lined up. Gasket and hardware look nice too. Not much to say until I drop it in the car and check clearance though...

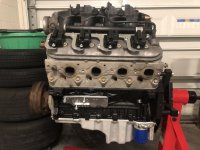
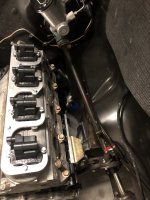
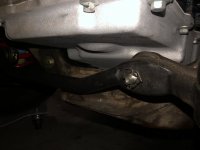
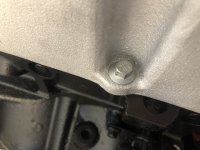
And no there is not a bolt missing, I guess one is not tapped on the block.....
 

Attachments

  • IMG_2973.JPG
    IMG_2973.JPG
    139 KB · Views: 16
  • IMG_2974.JPG
    IMG_2974.JPG
    116.3 KB · Views: 17
  • IMG_3003.jpg
    IMG_3003.jpg
    121.1 KB · Views: 14
  • IMG_3004.jpg
    IMG_3004.jpg
    119.1 KB · Views: 13
  • IMG_3005.JPG
    IMG_3005.JPG
    119.9 KB · Views: 13
Headers look good. For the price compared to the hooker ones even if I have to massage them I’m okay with that :)
 

Attachments

  • 47F57A9D-253F-4C36-993F-4DD395F1C757.jpeg
    47F57A9D-253F-4C36-993F-4DD395F1C757.jpeg
    116.4 KB · Views: 11
  • 893896F4-1BEB-4A7F-9638-726E135659DD.jpeg
    893896F4-1BEB-4A7F-9638-726E135659DD.jpeg
    128.6 KB · Views: 10
  • B91FFF2C-7916-4E98-B9A6-E0C9853CF486.jpeg
    B91FFF2C-7916-4E98-B9A6-E0C9853CF486.jpeg
    123.1 KB · Views: 9
  • 0A1806B6-4AF7-4D71-8AD1-4F1A1E4628ED.jpeg
    0A1806B6-4AF7-4D71-8AD1-4F1A1E4628ED.jpeg
    133.7 KB · Views: 9
  • ED534498-1150-47CE-AEE6-3FB20B183D53.jpeg
    ED534498-1150-47CE-AEE6-3FB20B183D53.jpeg
    146.4 KB · Views: 10
Hoping for this weekend, if not then next one we should see how and if it all fits!
 

Attachments

  • IMG_3011.JPG
    IMG_3011.JPG
    136 KB · Views: 8
  • IMG_3012.JPG
    IMG_3012.JPG
    136.3 KB · Views: 9
Getting that oil pump o ring right vs wrong is life or death for that engine. Imagine trying to drink through a straw with a hole above the liquid. Pick up tube depth is also important again life or death. May want to look into MLS header gaskets. (GM factory style) oil pump girdle is a add layer of security. If the pick up tube came with 2 bolts attachment a girdle isn’t needed (Holley 302-3 has a 2 bolt setup)
 
Engine is in! Okay first things first. I want to say I do not see how I could have gotten it in without that Oberg tilt lift (maybe if I had a helper but this was a one man job). Worth every bit of the 90 bucks I paid! That little guy is amazing, you can tilt the engine back and forth with a 1/2 inch ratchet, almost effortlessly.

Okay so now the good stuff. It was not easy, so if you are expecting it to drop in nicely for some reason like I was be prepared to be disappointed!

Engine/trans went in once and then I took it out, was not dropping on the factory engine mounts all the way. I also could tell there was a little interference with the trans cooler lines to floor and the bell housing to the floor. Also the oil pan was hitting the cross-member, I had to use every bit of back spacing (heads up to firewall) intake had to come off, in order to get it to drop and I will admit I used a bar between the oil pan the cross-member to get it back just enough to drop. Another person helping push the engine back while I was slowly dropping would have helped and I am sure the bar would not have been needed but you can see the one picture where the front of the oil pan is right above the back of the cross member and it just need that little bump to go back in order for the engine to drop.

So after I took it out the first time I took a hand sledge and did some massaging everywhere I saw the trans was coming in contact with the floor. Mainly around the area of the cooler lines and top of bell housing. You could argue maybe it is not needed but I think this was necessary to get the engine to drop on the factory mounts. I think using a jack to bring the back (tail shaft) up and front of engine down was necessary and the massaging gave it some clearance to come up.

Another important point is that I had to loosen the factory mounts where they connect to the cross-member. Three bolts on each side. This helped to bring them up a little so I could get the mount bolts in. I also had to play a little dropping it down and up and then using a jack under the tail shaft of the trans in order to get it to finally take a seat.

Now on the oil pan, I would be surprised if I could get a piece of paper in there between it and the cross-member. I would say the engine needs to go back just a touch more. Maybe the holley mounts do that....? If I knew for a fact the Holley pan has more clearance or the mounts put the engine back just a little I would have paid the extra but remember I opted to not use the Holley engine mounts and cross-member, so I could easily have these same issues with the holley pan, keep that in mind. I used ICT billet plates with energy suspension factory engine mounts. Maybe a lap wheel to the oil pan would help a clearance little, not sure I would want to do that but the final word is that it fits but it is TIGHT to the cross-member. Overall I am still happy I did it this way because I have saved a lot of money.

I am curious for guys that used the holley engine mounts and oil pan if it was literally drop it, easy or you still had to play around to get it to sit??? If you can honestly say that it dropped in easy and no back and forth then I would say it is worth it to go with the holley stuff. And please, not you heard it was easy but only if you yourself actually did the swap, let us know.


Next we will see how these headers fit. Driver's side looks like it will be TIGHT but the passenger side looks like a breeze.
 

Attachments

  • IMG_3072.JPG
    IMG_3072.JPG
    124 KB · Views: 6
  • IMG_3053.JPG
    IMG_3053.JPG
    149 KB · Views: 5
  • IMG_3055.JPG
    IMG_3055.JPG
    166.5 KB · Views: 6
  • IMG_3060.JPG
    IMG_3060.JPG
    121.5 KB · Views: 7
  • IMG_3061.JPG
    IMG_3061.JPG
    141.7 KB · Views: 7
  • IMG_3069.JPG
    IMG_3069.JPG
    128.3 KB · Views: 7
  • IMG_3070.jpg
    IMG_3070.jpg
    111 KB · Views: 6
  • IMG_3073.JPG
    IMG_3073.JPG
    135.3 KB · Views: 6
  • IMG_3074.JPG
    IMG_3074.JPG
    148.7 KB · Views: 5
  • IMG_3075.JPG
    IMG_3075.JPG
    131.5 KB · Views: 5
  • IMG_3076.JPG
    IMG_3076.JPG
    120.2 KB · Views: 5
  • IMG_3077.JPG
    IMG_3077.JPG
    136.7 KB · Views: 7
Last edited:
Install the headers from the bottom that makes them way easier to install. Did mine in 20 minutes. The first time took about 3 hours from the top and many curse words.
 
Install the headers from the bottom that makes them way easier to install. Did mine in 20 minutes. The first time took about 3 hours from the top and many curse words.
I always hang mine with string attached to the upper control arms before setting the engine in.
The drivers side is impossible in a 68 Camaro unless you do that.
 
Hows the tie rod clearance? I posted pictures of my -2 oil pan clearance on the first page. 1" setback mount plates with standard frame stands.the engine/trans dropped in with zero issues by myself.
 
So it just kisses it on the passenger side, it is losing about half a turn on the passenger side. It is odd though because the driver's side there is plenty of space....with all of the extra space on the driver's side I think the engine is cocked a little TBH.
 

Attachments

  • IMG_3078.JPG
    IMG_3078.JPG
    100.6 KB · Views: 6
  • IMG_3079.JPG
    IMG_3079.JPG
    86.7 KB · Views: 6
  • IMG_3093.JPG
    IMG_3093.JPG
    90.9 KB · Views: 7
Last edited:
Top Bottom